Benefits of Concrete Channel Drainage Systems
You’ve likely watched a miniature lake form at the edge of your driveway during heavy rain, slowly creeping toward your garage door. Standing water is much more than a temporary backyard nuisance. According to residential foundation experts, pooling water acts as a serious structural threat that eventually cracks concrete slabs.
Solving this frustrating issue requires looking past your roof and focusing on the pavement. While most homeowners understand traditional gutters, a proper driveway drainage channel serves as essential gutters for the ground. Think of it like a long, narrow sink built directly into your pavement to catch runoff.
Material selection completely dictates how long this underground sink will last. Industry data reveals that a professional-grade concrete channel drainage system survives decades longer than cheaper alternatives. Unlike flimsy plastics, solid concrete refuses to rust, bend under a heavy SUV, or float away during a massive downpour.
These heavy-duty systems actively move water away from structures, delivering permanent peace of mind and protecting your overall property value.
Stop the ‘Mini-Lake’: How Channel Drains Protect Your Home’s Foundation
Surface water runoff pooling exactly where the driveway meets the garage poses a severe hidden threat. Think of the soil around your home like a giant sponge. As it absorbs rain, it creates “hydrostatic pressure”—the immense weight of trapped water physically pushing against your foundation walls. This relentless squeezing forces moisture through microscopic cracks, leading to damp basements and massive repair bills.
The smartest way to fight this invisible pressure is catching the water before it ever soaks into the dirt. Installing concrete channel drainage in critical zones, like the low spots near your patio, creates an active barrier. It intercepts the flow, acting as a ground-level gutter that safely carries water away from your house.
Building a diy concrete drainage channel is an affordable way to protect your biggest investment from water damage.
Choosing Your Shield: Polymer Concrete vs. Standard Precast Drains
Deciding on materials usually brings up the debate of polymer concrete vs precast concrete drains. Standard concrete uses plain cement and water to bind gravel together. Polymer replaces that cement with a heavy-duty liquid resin. Think of it like mixing rocks with industrial superglue; the result is a remarkably tough, waterproof material.
This resin swap is a massive advantage for DIY projects. A traditional precast drainage channel is notoriously heavy, often requiring extra hands or machinery just to drop it into a trench. Because polymer is much stronger, the walls can be cast thinner, making it light enough for one person to maneuver easily.
Water also moves significantly faster through a polymer concrete drainage channel. The resin creates a glass-like finish inside the trough, increasing the “hydraulic flow rate”—simply meaning how rapidly water rushes through. This slick interior stops silt from getting stuck and clogging your system, while also easily resisting damage from harsh winter road salts.
Key differences to guide your choice:
- Handling: Polymer is lightweight and DIY-friendly; precast requires heavy equipment.
- Maintenance: Polymer’s smooth surface flushes out debris; traditional precast catches more dirt.
- Best Use: Pick polymer for residential areas; save standard precast for ultra-heavy industrial loads.
The ‘Footprint’ Test: Understanding Load Classes for Your Driveway or Yard
Think about the difference between a person walking across your lawn versus a delivery truck driving over it—they leave very different footprints. The drainage industry measures this physical impact using EN 1433 load class ratings. This standard acts as a durability code on product labels, telling you exactly how much weight a channel can hold before cracking.

Decoding these labels is straightforward once you understand the basic weight categories:
- Class A (Pedestrian): Built strictly for foot traffic on patios or pool decks.
- Class B (Residential Driveway): Designed for everyday family cars and light SUVs.
- Class C (Light Commercial): Handles heavy delivery vans; an excellent upgrade for home driveways.
- Class D (Heavy Traffic): Used for heavy duty channel drainage and strict commercial loading bay drainage requirements.
Making a mistake here can be an expensive headache. If you install a flimsy Class A grate across a driveway, the first delivery truck that rolls over it will crush the plastic. To protect your investment and avoid underestimating vehicle weight, always select at least a Class B or C rating for home driveways.
Getting the ‘Fall’ Right: Why Slope is the Secret to Clog-Free Drainage
If a trench is laid flat during concrete drainage channel installation, it stops being a drain and becomes a long, shallow bucket. This stagnant water smells terrible as debris rots and creates a prime breeding ground for mosquitoes. To keep water moving naturally, your system needs a continuous downward tilt, simply known in landscaping as “fall.”
Figuring out exactly how much fall for drainage channel setups is necessary involves following the “1% rule,” meaning the trench should drop about 1/8 inch for every foot of length. When researching how to install drainage channel sections properly, professionals emphasize the “invert level.” This is the lowest inside bottom point of the pipe where water actually flows, and setting this starting depth correctly ensures your slope pushes runoff smoothly toward the final outlet.
Nailing this gentle angle guarantees gravity completely empties the system, preventing sitting water in your driveway.
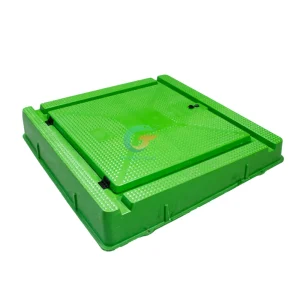
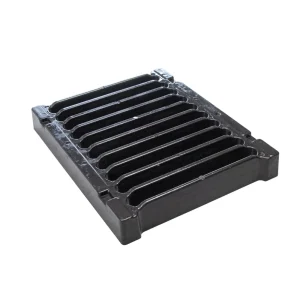
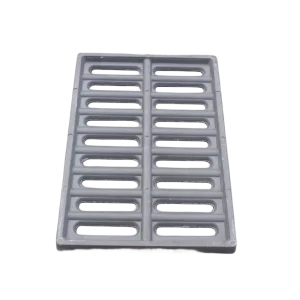
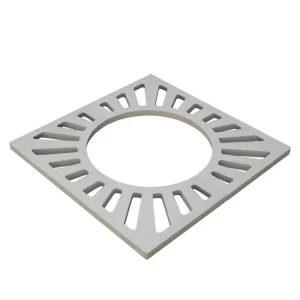
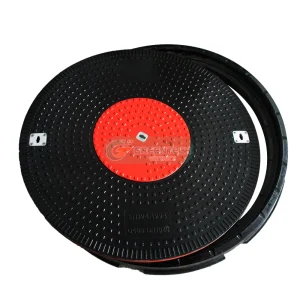
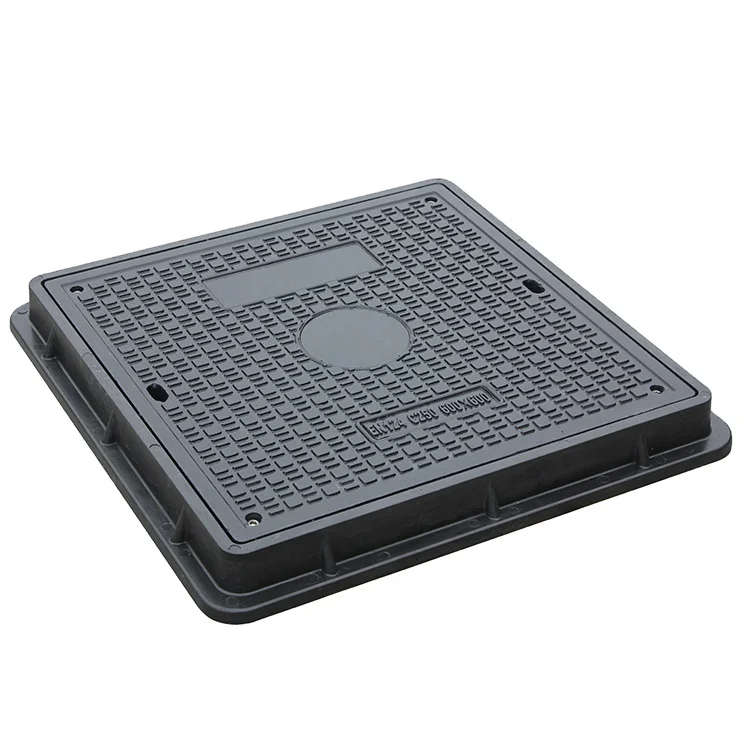
Grates and Guards: Selecting the Right ‘Lid’ for Safety and Style
Think of the grate as the protective “lid” to your long ground sink. Beyond simply filtering out leaves, it must be safe for both walking and driving. On patios or pool decks, reinforced heel guard grates are absolutely essential; their tightly spaced narrow openings stop high heels, tiny toes, and pet paws from getting stuck. For driveways, using lockdown bolts prevents these lids from dangerously shifting or loudly rattling under heavy vehicles.

Looks and strength matter equally when comparing cast iron vs galvanized steel grates or choosing slot drainage systems for heavy traffic:
- Cast Iron: Extremely strong. It naturally develops a “patina”—a harmless, protective brown surface rust that provides a beautiful rustic finish for traditional homes.
- Galvanized Steel: Delivers a sleek, rust-resistant silver shine that is perfect for modern patios.
- Plastic: Cost-effective and lightweight, best suited for garden walkways where cars will never go.
Securing the perfect grate completes your everyday defense against destructive puddles.
The 30-Minute Maintenance Routine: Keeping Your System Flowing Year-Round
Even the best grate lets tiny dirt particles pass, relying on hidden heroes called sediment buckets. Think of these like your dryer’s lint screen. Mastering the “lift and clear” method for cleaning sediment buckets and debris traps takes minutes—simply pull the basket, dump the mud, and replace it.
Removing dirt early extends the lifespan of your concrete channel drainage by preventing trapped moisture from freezing and cracking the trench. Always watch for warning signs of a downstream clog, like water pooling around the grate instead of flowing away. If puddles linger, a quick hose blast clears blockages before flooding happens.
Your Roadmap to a Dry Property: Planning Your Concrete Drainage Project
Concrete wins because it outlasts plastic without bending under pressure. Before installing drainage channel sections, step outside and measure your driveway area to calculate your exact water flow needs. Ensure your project checklist includes all the essentials: channels, grates, end caps, and outlets.
Use this Go/No-Go checklist to decide between tackling a DIY weekend or hiring a professional:
- Tools check: Can you dig a precise trench and mix heavy concrete?
- Weight check: Can you handle the exact bedding and haunching requirements for drains to lock the system firmly in place?
- Level check: Can you reliably maintain a perfect downward slope?
Embracing a drainage-first mindset actively protects your home’s foundation. Whether you are fixing a soggy residential driveway or exploring heavy-duty industrial yard drainage solutions, thorough planning ensures your property remains safe, dry, and structurally sound through every season.